
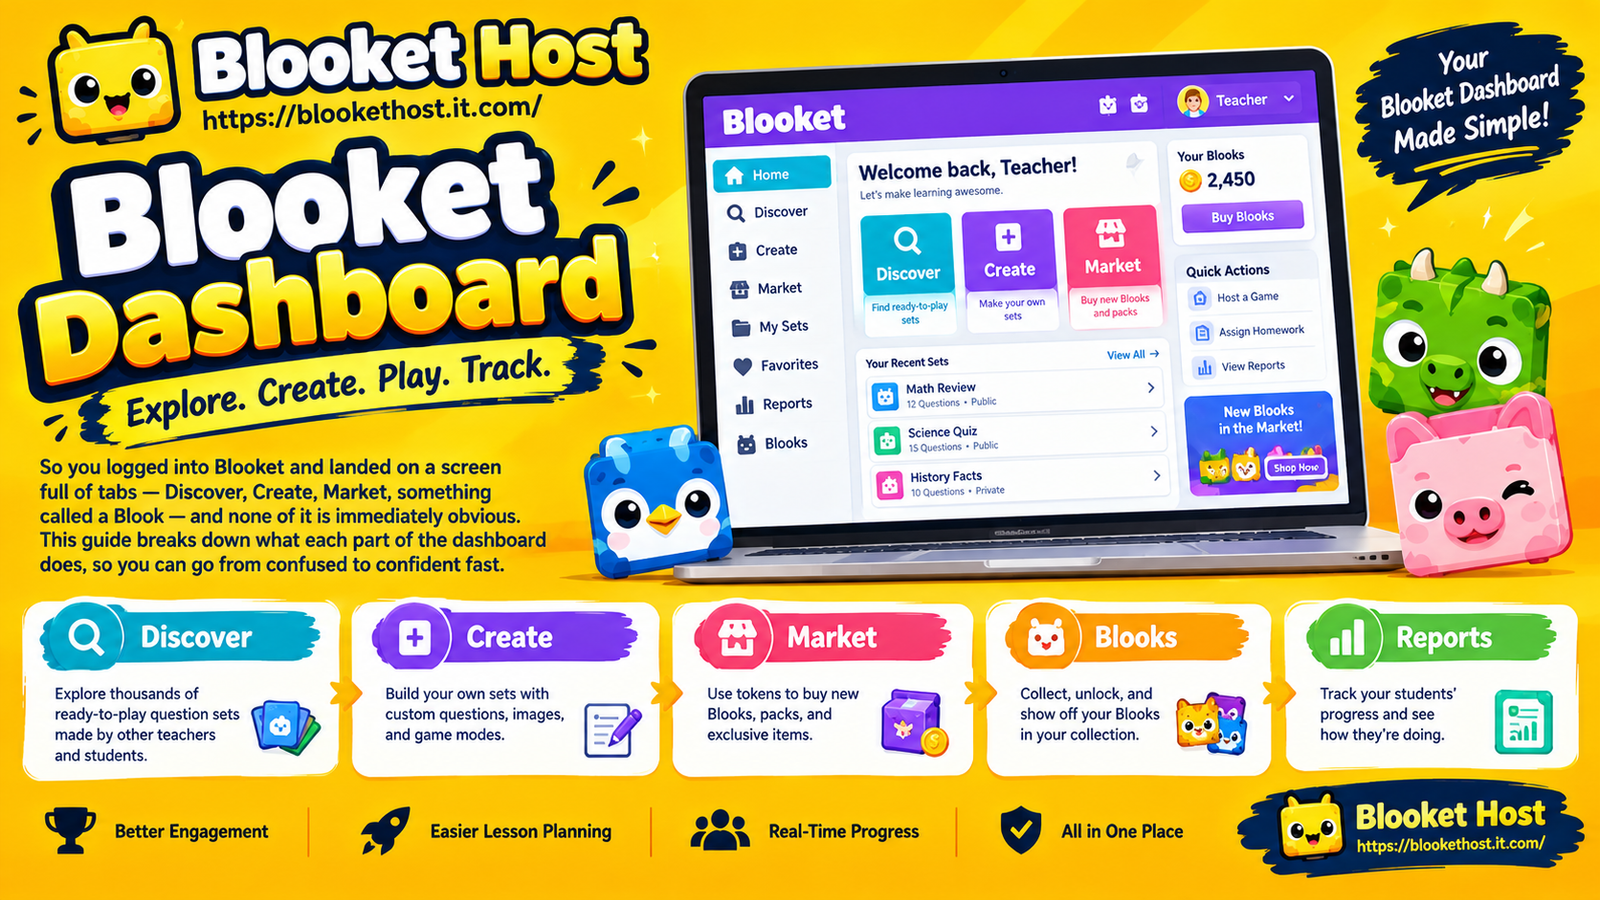
So you logged into Blooket and landed on a screen full of tabs — Discover, Create, Market, something called a Blook — and none of it is immediately obvious. If you’re wondering how to use the Blooket dashboard, you’re not alone; almost every new user hits this same wall of unfamiliar labels on their first login. This guide walks through exactly what each part of the dashboard does, so you can go from confused to confident in a few minutes rather than clicking around hoping something makes sense.
Getting to the Dashboard
The dashboard is what you land on after logging in through id.blooket.com with your Email, Google, or Clever account. It’s your home base for everything account-related — hosting games, managing question sets, checking your token balance, and browsing the market. If you’re just trying to join a game as a student, note that you don’t need this page at all; that process happens separately at play.blooket.com. The dashboard is specifically for account holders managing their own content and games.
Breaking Down the Main Tabs
Once you’re logged in, you’ll typically see a navigation bar or sidebar with several core sections. Here’s what each one actually does.
Discover
The Discover tab is your browsing hub for question sets other users have created and made public. Instead of building every quiz from scratch, you can search by subject, grade level, or topic and find pre-made sets ready to host immediately. This is often the fastest way to get your first game running, especially if you’re new to hosting and don’t want to spend time building content before you’ve even tried the platform.
Within Discover, you can usually preview a set’s questions before committing to host it, which is worth doing — a set’s title doesn’t always tell you enough about difficulty or content depth to know if it fits your group.
Create
The Create tab is where you build your own question sets from the ground up. This is the tool to use when you need content tailored precisely to what you’re teaching, rather than relying on someone else’s set that might not quite match your curriculum.
Building a set here typically involves entering questions, answer choices, and marking the correct response, with options to add images or adjust formatting depending on the question type. Once built, your set is saved to your account and can be hosted the same way a Discover set would be, or kept private if you don’t want to share it publicly.
Market
The Market is where tokens actually get spent. This is the shop-style section where you use tokens earned through gameplay to purchase packs, which contain Blooks — the characters/avatars used throughout the platform. Packs vary in theme and token cost, and opening them is randomized, meaning you don’t know exactly which Blook you’ll get until you open it.
If you’re new to the dashboard, the Market is usually the section that generates the most questions, mainly because token costs and pack contents aren’t always intuitive on a first glance. Spending time browsing here before your first purchase helps you understand what’s actually available before committing tokens.
Blooks
This section is your personal collection view — essentially an inventory of every Blook you’ve unlocked through opened packs. It’s where you can see your full collection, check rarity tiers, and sometimes select which Blook you want active as your avatar for upcoming games.
Building out this collection is a big part of what keeps players opening packs over time, since rarer Blooks are harder to pull and often become a kind of visible status within a classroom or friend group.
Host / Play Controls
Depending on your account setup, you’ll typically see a clear option to start a hosted game directly from the dashboard, usually attached to whichever question set you have open — whether that’s one you built in Create or found in Discover. This is the button that actually generates your live Game Code and moves you into the hosting dashboard covered in more detail in our hosting guide.
Understanding Your Token Balance
Somewhere on your dashboard, usually near the top, you’ll see your current token count. Tokens are earned through gameplay — both live hosted games and solo play — and spent primarily in the Market on packs. Keeping an eye on this number helps you plan: if you’re saving for a specific themed pack, knowing your current balance against that pack’s cost tells you how much more grinding you need to do.
Account Settings
Tucked into most dashboards is a settings area covering the basics: updating your display name, adjusting notification preferences, and managing your login method. This is also typically where you’d go if you needed to switch sign-in methods or address any account-level issues, separate from anything related to hosting or playing itself.
A Simple First-Time Walkthrough
If you’ve just logged in and want a quick win to get oriented, try this sequence:
- Check the Discover tab and browse a subject you’re interested in.
- Preview a question set to see what hosting content actually looks like.
- Visit the Market just to browse — no need to spend tokens yet — so you understand pack themes and costs before you’re actually ready to buy.
- Check your Blooks tab to see your starting collection, even if it’s just a default character.
- Return to Discover or Create when you’re ready to actually launch your first hosted game.
Walking through the tabs once without any pressure to “do” anything makes the real first hosting session much less overwhelming.
Why the Dashboard Feels Overwhelming at First
Most of the initial confusion isn’t really about complexity — it’s about unfamiliar labeling. “Discover,” “Create,” and “Market” don’t immediately explain themselves the way more generic labels like “Browse Sets” or “Shop” might. Once you connect each tab to its actual function — browsing vs. building vs. spending — the dashboard stops feeling like a maze and starts feeling like exactly what it is: a fairly simple hub organized around a few core actions.
The Bottom Line
The Blooket dashboard only has a handful of core sections, and each one maps to a specific, simple purpose: Discover for finding content, Create for building your own, Market for spending tokens, Blooks for your collection, and account settings for the basics. Once you’ve clicked through each tab once with no particular goal in mind, the unfamiliarity fades fast — and what looked like a confusing wall of tabs on your first login starts to feel like second nature within a session or two.